When checking out, simply select the "New Customer" option. All you need to get started is a valid email address and a secure password of your choosing. After your purchase is complete, your account will be created, and you will immediately gain all the benefits of being an account holder. If you have previously placed an order with us as a guest, you can try using the "Forgot Password" feature under the "Sign In" tab.
Benefits of having an account:
Real-time status updates on all your orders and returns.
Ability to view detailed order history.
Eligibility to enroll in subscription items for recurring discounts.
Access to more store features and quicker customer support.
Connection to a dedicated sales representative if placing bulk orders.
Manage your account settings:
Update your email address and password.
Unsubscribe from email promotions.
Manage item subscriptions.
Delete your account and remove your information.
We respect your privacy and are committed to protecting any personal information you may provide us through our Website. View our privacy policy for more info.
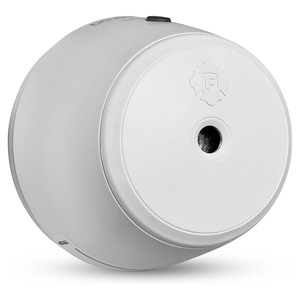
Carbon monoxide (CO) alarms don’t last forever. Over time, sensors wear out and electronics age, which is why First Alert CO alarms have a recommended replacement schedule. This step-by-step guide explains how to tell when it’s time to replace your CO alarm, how to choose the right replacement, and how to safely remove and dispose of your old unit.
When to Replace Your First Alert Carbon Monoxide Alarm
CO alarms have a limited service life. Even if the alarm seems “fine,” the sensor can become less reliable as it ages. Replacing on schedule helps ensure your home stays protected.
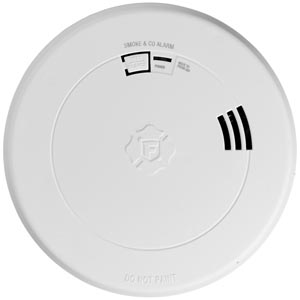
Common signs it’s time to replace
End-of-life (EOL) signal: many alarms chirp or display an indicator when they reach the end of their service life (varies by model).
Age: if you don’t know how old the alarm is, it’s safer to replace it rather than guess.
Repeated trouble chirps: after confirming power/battery and cleaning the unit.
Physical damage: cracked housing, water exposure, heavy corrosion, or paint/contamination.
After a CO incident: if emergency services respond or you had significant CO exposure, replace the alarm unless your manual says otherwise.
How to check the date
Look for a manufacture date on the back or side label.
Some models also have a replace by date or a printed service-life note.
If the label is missing or unreadable, treat the alarm as unknown age and replace it.
Before You Start: What You’ll Need
Your new First Alert CO alarm (or combination alarm if that’s what you’re upgrading to)
Batteries (if your new model uses replaceable batteries)
Phillips screwdriver
Small step stool (for ceiling installs)
Optional: vacuum/soft brush to clean dust from the mounting area
Choosing the Right Replacement CO Alarm
The right replacement depends on how your current alarm is powered and where it’s installed. In many cases, the simplest approach is to replace “like for like” (same power type), then consider upgrades such as battery backup or digital display.
Match your power type
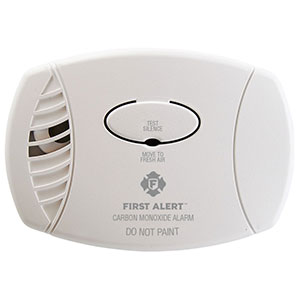
Battery-operated: flexible placement, easiest DIY replacement, good for adding coverage.
Plug-in: quick replacement if you have a good outlet location; consider a model with battery backup.
Hardwired: typically a direct replacement when you already have wiring and an electrical box; many homeowners use an electrician.
Consider these upgrade features
Battery backup: helps keep protection during power outages (plug-in and hardwired models may offer this).
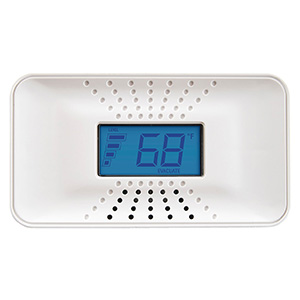
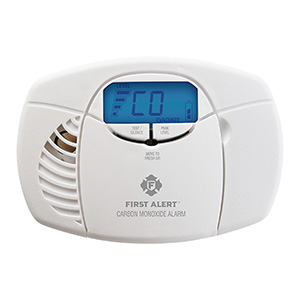
Digital display: can show current CO reading or peak memory (model-dependent).
Interconnect: certain hardwired systems can sound multiple alarms together (model/wiring-dependent).
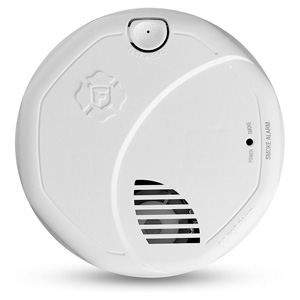
Combination protection: smoke/CO combo alarms can simplify coverage in some locations (only if appropriate for the space and placement rules).
Placement reminder
Install CO alarms outside each sleeping area and on every level of the home (including basements).
CO alarms do not need to be near the floor; follow your manual for wall/ceiling placement guidance.
Avoid dead-air corners and strong drafts from vents, fans, windows, or doors.
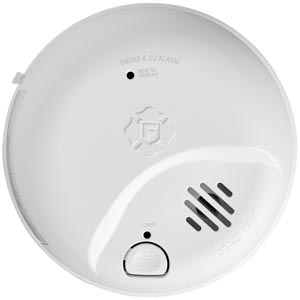
Step-by-Step: Replace a Battery-Operated CO Alarm
Test the old alarm (press Test/Silence) so you know the sound and confirm it’s currently powered.
Remove the alarm from its bracket (often a twist-off or release tab).
Remove batteries from the old unit to stop chirping and prepare for disposal.
Check the mounting bracket and decide whether to reuse it (many replacements include a new bracket).
Install the new bracket if needed (use anchors if mounting into drywall).
Install batteries in the new alarm (or activate sealed battery per instructions).
Attach the new alarm to the bracket until it locks in place.
Press Test/Silence to confirm correct operation.
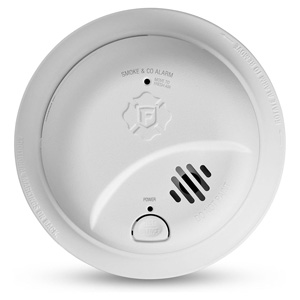
Step-by-Step: Replace a Plug-In CO Alarm
Unplug the old alarm from the outlet.
Remove backup batteries (if present) to stop chirps and prepare for disposal.
Inspect the outlet location to make sure it’s not blocked by furniture and isn’t controlled by a wall switch.
Install backup batteries in the new alarm if it supports them.
Plug in the new alarm firmly into the outlet (avoid extension cords unless the manual allows it).
Press Test/Silence to confirm power and alarm sound.
Step-by-Step: Replace a Hardwired CO Alarm
Hardwired alarms connect to household wiring and may be part of an interconnected system. If you’re not experienced with electrical work, use a qualified electrician.
Hardwired replacement overview
Turn off power at the breaker for the alarm circuit.
Remove the old alarm from the mounting plate.
Disconnect the wiring connector (varies by model).
Install the new mounting plate if required.
Connect the wiring using the provided connector and confirm it is seated correctly.
Install backup battery (if supported by the model).
Attach the new alarm to the mounting plate.
Restore power at the breaker.
Press Test/Silence to confirm operation (and interconnect function, if applicable).
Hardwired safety notes
Never work on wiring with power on.
If the alarm is interconnected, test from multiple units after replacement.
If anything looks different from your new alarm’s manual (wire colors, connector type, electrical box), stop and consult a professional.
After Replacement: Testing and Maintenance
Test immediately after installation using the Test/Silence button.
Test regularly (many households test monthly).
Keep it clean by gently removing dust around vents according to the manual.
Write the install date on the alarm or inside your home maintenance log.
Disposal & Environmental Safety
CO alarms contain electronic components and (often) batteries. Proper disposal helps protect the environment and prevents battery hazards.
How to dispose of your old CO alarm
Remove batteries (if removable) and recycle them according to local battery recycling guidelines.
Do not burn or incinerate the alarm or batteries.
Recycle electronics where available (many communities have e-waste drop-off sites).
If your alarm has a sealed battery, treat the entire unit as electronic waste and follow local rules.
Safe handling tips
If the alarm was exposed to water, smoke, or heavy contamination, handle it carefully and dispose as e-waste.
Store removed batteries away from metal objects until they can be recycled to reduce short-circuit risk.
FAQs
How do I know if my CO alarm is expired?
Check the label on the back for a manufacture or replace-by date. Many models also chirp or display an end-of-life indicator when the sensor has reached the end of its service life.
Can I reuse the old mounting bracket?
Sometimes, but not always. If the new alarm includes a bracket, using the new bracket is often the easiest way to ensure a secure fit and proper alignment.
Do I need to replace all CO alarms at the same time?
It’s recommended to replace alarms that are at or near end-of-life. Replacing them together can simplify maintenance, but the key is not letting any unit remain past its service life.
Should I replace a hardwired alarm myself?
If you’re not experienced with electrical work, it’s safer to use a qualified electrician—especially if the alarm is part of an interconnected system.
How should I dispose of an old CO alarm?
Remove and recycle batteries if possible, then take the alarm to an electronics recycling (e-waste) location. Follow local guidelines, especially for sealed-battery models.
Learn where to install carbon monoxide alarms, how many you need, and placement tips for houses, apartments, and rentals - plus what to do when an alarm sounds.